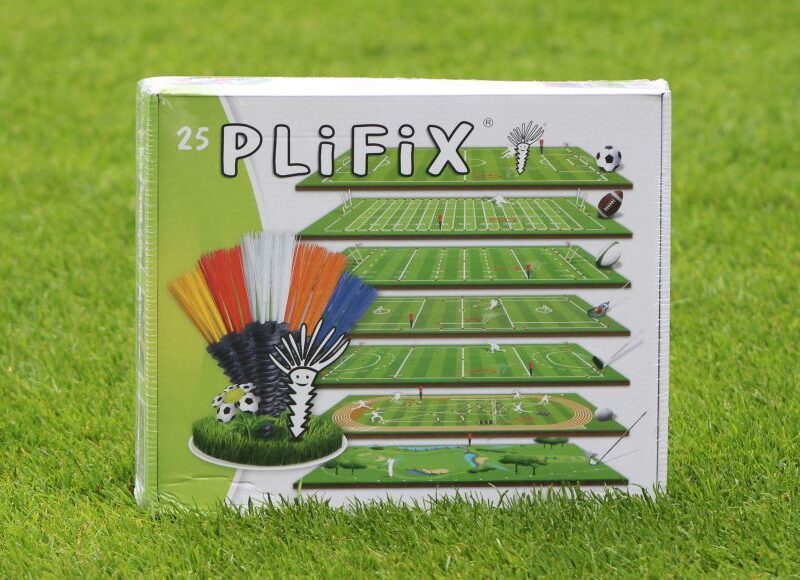
Plifix synthetic grass tuft implants are a safe and permanent ground line marking system. They are the most practical solution for marking buried objects or setting lines and boundaries.
The Plifix tough fibres are UV stabilised to prevent fading and come in a range of 4 colours white, blue, red and yellow. Once screwed into place the grass tufts remain in situ during mowing, fertilizing and any other ground care that is required.
Supplied with 25 in a box.
The Plifix technology is protected by patent and used by professional landscapers, greenkeepers, groundsman and gardeners worldwide.
The product is present in more than 200,000 sports grounds in Europe and they are used to mark out playing fields, ensure the exactness of dimensions and facilitate the marking of lines.
Uses
Sports Grounds
Golf Courses
Racecourses
Car Parks
Camp Sites
Virtual Fences
Gas
Building Sites
Athlectics
Sprinklers
Stabilised Surfaces
Electricity Wiring
Telecoms Cables
Pipes
Colours
Plifix use different colours according to standard colours used in building and civil engineering: Plifix tufts are supplied in white, red, blue and yellow.
Safety
You can walk on a Plifix bare foot without suffering any damage. The contact of the Plifix fibres on skin has the same effect as the bristles of a toothbrush.
Installation Guidelines
Choose a location, then manually push the Plifix screw 2cm into the ground.
This makes it easier to adjust the alignment of several Plifix along the same line.
On clay surfaces turn the Plifix upside down and balance it on the fibres.
Place the driving tool onto the screw ensuring the fibres are inside the tube.
Hit with a hammer until the dotted ‘‘STOP’’ line, then remove the driving tool.
The top of the screw must be 3cm beneath the level of the ground, so that the fibres are 3 to 4cm above the hole. Stabilised surfaces and clay: first of all make a hole using a small chisel.
Pour sand between the fibres to fill in the hole between the top of the screw and the ground.
Sand increases the resistance of Plifix against uprooting and gives the fibres a natural appearance.
Finish: gently hit the Plifix with the flat part of a hammer to give it a more natural appearance.
FAQ's
Are Plifix Reuseable?
If Plifix are used for temporary marking (building sites, areas undergoing repair work), they can be dug up and reused on another site.
How Solid & Durable Is the Product?
The screw resists repeated shocks by a hammer on the driving-tool, the only standard tool for fitting Plifix (other substandard objects can damage the fibres). The fibres have total elastic recovery, folded 140 degrees, they recover their initial position and resist a maximum thrust of 18 kg (then 30 kg once set in the ground)
Is Plifix Resistant to Heat & Frost?
Tests carried out show with high precision that the fibres become discoloured at 160 degrees Celsius and melt at 180 degrees Celsius. The screw burns at 345 degrees Celsius. Fibres and screws resist frost up to - 60 degrees C.
Is it Resistant To Products Used To Treat Lawns?
Plifix resists all products already tolerated by the natural environment.
Can Plifix Be Ripped Out?
No, once set, provided you follow the instructions, a Plifix will resist a maximum thrust of 30 kg. It is impossible to pull them out manually. To remove a Plifix you will need to dig it out using a chisel or a small crowbar.
How Long Should Plifix Last?
Between 4 and 8 years (sometimes longer) according to its exposure to U.V. and the strength of products used to treat the turf.
How Do You Remove Plifix?
• Using a flat tipped chisel: with a hammer push the chisel along the screw at a depth of 10cm then make it pivot like a lever so that the Plifix moves towards the surface.
• Using a PVC tube 20cm long and with a diameter of 4 - 5cm: place the tube on the Plifix, drive it into the ground using a hammer to a depth of 15cm then remove the entire tube with the Plifix inside.
What About Mowing?
When fitted Plifix are driven in until the fibres no longer exceed the desired cutting height. The blade of the mower will therefore pass over the fibres (Ideal for mowing height marker)
If Plifix are fitted above the usual height, the fibres will be cut and graded the first time they are mowed. However if you follow the instructions, only 3 to 4 cm of fibres are above the surface of the ground, which corresponds to the usual cutting height of a garden lawn or turf in a sports ground.
Important: The product includes the driving tool for installation and a complete set of instructions.


